Oscilloscope
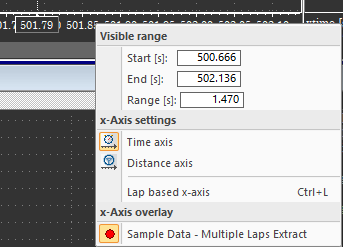
X Axis
Settings for the X Axis can be found by Right Clicking anywhere on the X Axis scale.
From here you can control:
- Start/End/Range of the X axis.
- Time in seconds or Distance in meters
- Lap based x-axis (X Axis in lap distance or laptime)
Middle Click Window
Settings controlling the oscilloscope are available by Middle Clicking or Left + Right Clicking.
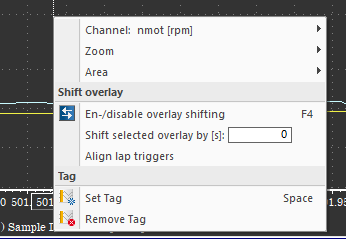
From here, you can control:
- Settings related to the selected Channel
- Settings related to the Zoom level
- Add/Remove Chart Areas
- Enable/Disable File Shifting (Click + drag an overlay)
- Define a File Shift in X-Axis units (seconds/meters)
- Align lap triggers of different overlays
- Set or Remove a Tag
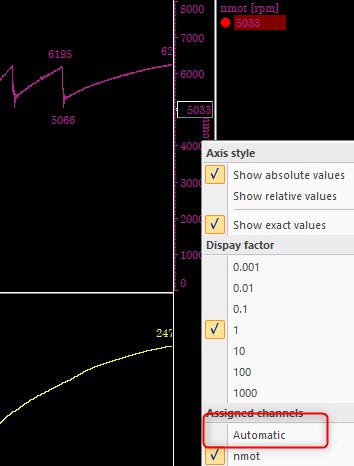
Automatic Y Axis
- After the user added a y-axis for a channel in the oscilloscope, the y-axis context menu can be used to turn the y-axis into an “automatic y-axis” (click “Selected channel” in the context menu)
- An automatic y-axis always shows the corresponding y-scale for the selected channel in this area.
- A second click on “Selected channel” REMOVES the automatic y-axis.
- If a channel is dropped onto an automatic y-axis, the y-axis is a normal axis for the channel.
- Note: A automatic axis always fills the complete height of the y-axis area and cannot be changed (height or vertical position).
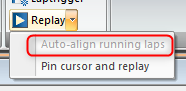
Auto-align Telemetry and Logged Data
- If the option “Auto-Align running laps” is enabled all running laps of telemetry streams are automatically aligned and the oscilloscope is scrolled so that the aligned lap trigger is located at the left edge of the oscilloscope.
- As soon as the next lap trigger is received, the new lap is automatically aligned to the other laps.
- Note: While replaying the cursor is always moved to/for the overlay, which is the closest to the right side of the oscilloscope. This ensures that all values (channels pane, analysis windows) are evaluated for the current values.
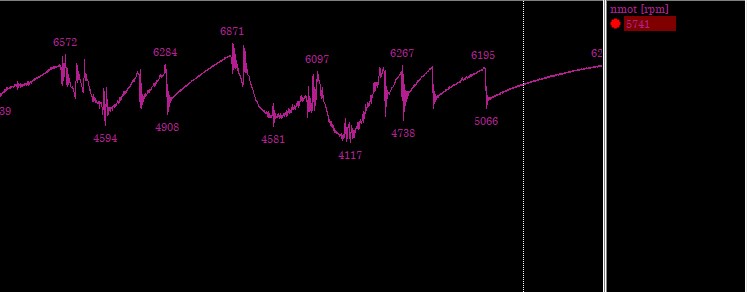
Show Extremas
How to find it
- Highlight Channel in Oscilloscope
'D' key -> 'E' key

Channel Menu/Tab
Example