Working with the Flow Chart Window
Modes
There are two modes: Edit and Auto Run, for the flow window.
Edit mode |
|
Start→Settings→Design | In edit mode you can insert, delete, copy, paste objects or links. |

Run mode |
|
Start→Tools→Replay | Run mode will switch edit mode off. All flows will then be executed; one after another using the order of pages |
In this mode there are several cases in which calculation will start again automatically: |
|

- The sample range has changed (moving in bounded measure window, online files).
- Settings have changed (after OK of setup dialog or after loading).
In Run mode you can move, rearrange objects and change links, but it is not allowed to make changes in the logic of the flow.
"Edit mode" will stop current execution (see also Executing the flows) and "Run mode" will be switched off. This means that you will not have any updated results in output objects until you switch on "Run mode" mode again.
Active object
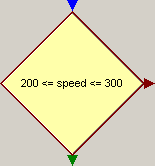
Clicking on an object will make it active. The active object has a red frame.
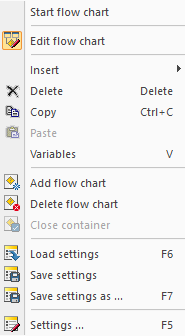
You can open and modify the active object settings. Open the dialog box using the context menu by pressing the right mouse button or using the hotkey F5.
- Only one object can be active at one time but you can mark several objects.
Selected objects
Hold Ctrl and click on objects you want to mark. The last clicked object will be also active object. You can mark objects also by dragging a rectangle on the page with left mouse button. All objects that are inside the rectangle will be selected.
The selected objects have a blue frame.
If two objects from a design page are selected then the links between them are also highlighted.
Inserting and deleting objects
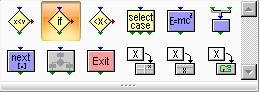
Flow objects - Design page
Insert |
|
| You can insert an object in Output or Design page using the menu Start→Flow objects. |
| The context menu is opened with the right mouse click. From the menu select the Insert and then select an object. |

- Insert is only available in edit mode.
Delete |
|
| Delete marked objects |
If you press a button with a flow object on the toolbar you enter the insert mode for the object. In insert mode every click on the page will be inserting an object only if the click is not associated with other actions with bigger priority (move, resize, connect-click on connectors of an object).
Switch off insert object mode |
|
| Press the arrow on the toolbar to switch off the insert mode. |
Move, Copy, Paste Object(s)
|
|
| If there are marked objects you can move them. Moving one of the marked objects will move all others too. The relative arrangement between them will stay. Only the links which connect marked object with not marked one will be changed during the movement. You can use the keys Up, Down, Right, Left to move the selected objects also. |
Copy | Will copy all marked objects (and their links if any) to clipboard. |
Paste | If clipboard is not empty you can paste the objects (and their links if any) from the clipboard. |
Resize Object
If only a part of the name of an object is visible, you can resize the object for the best fit. First make the object active and then if the mouse is near the frame of the object, you will see the resize mouse cursor and then you can resize it.
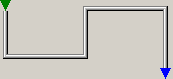
Object Connectors
| Every object in design pages has one input and/or one or several outputs. They are used to define the direction of execution. The object "Start" has no input connector. |
Input Connector | If the link which enters the connector is active then the object will start working. |
Output Connector (True Condition) | If this output is found as the results of the calculation of an object then the link that starts from with will be activated. In compare, condition and range this connector is chosen if the result is true. |
Out-Connector (False Condition) | In compare, condition and range this connector is chosen if the result is false. |
Connecting objects with links in design pages
You can connect objects with links. A link is created if you drag from output connector to input connector (or vice versa) with left mouse button down. The line will follow the mouse cursor.
If the mouse cursor is over a connector, it gets lighter. You can start a link when it is in edit mode and the connector is lighter color. You can finish the link if the end connector is lighter.
Tip: If the mouse cursor is over an output connector and you press right mouse button (content menu will appear) and select an object from "Insert" item of the content menu then the input connector of inserted object will be connected with the output connector.
Editing links
Clicking on a link will make it active. Then you can change the link with moving some parts (sub lines) of it left, right, top or bottom.